Edit Sequence – Edit Records
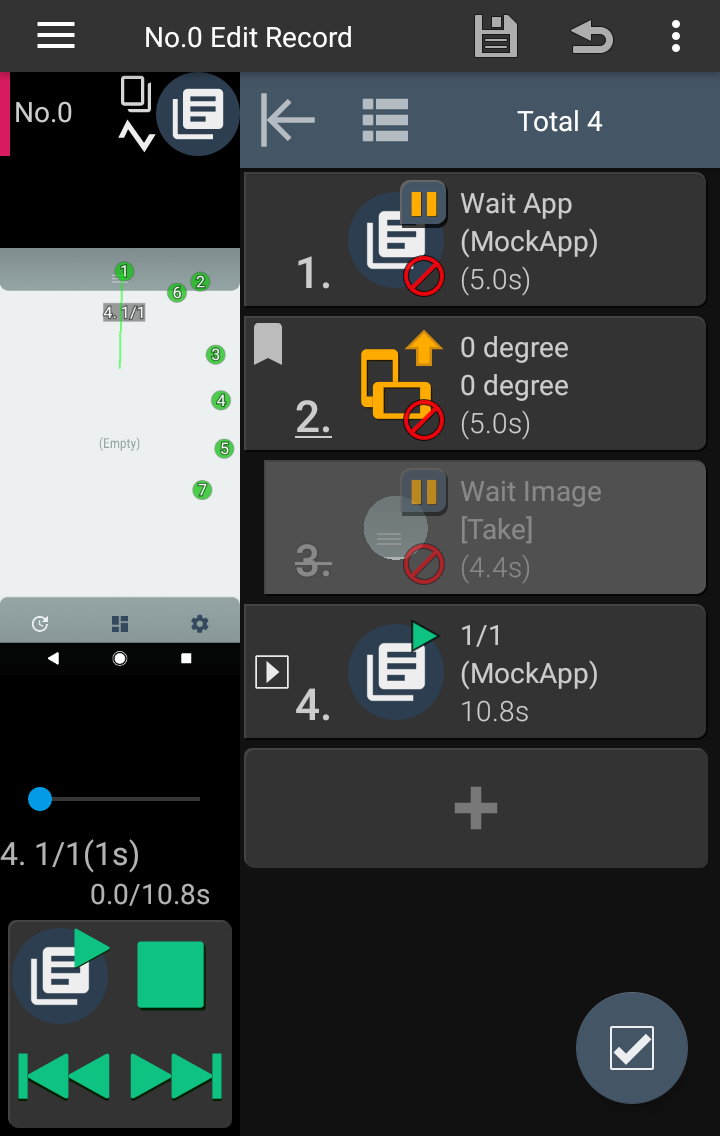
The result of the replaying recorded operation may differ depending on the app’s behaviour and/or situation. For example, the difference of the wait / delay because of the network speed, device load or such causes the different result from the recorded case. In such cases, the same operation does not reproduce the same result.
FRep2 can replay the operations with the function to judge the situation, to obtain desired results. Edit sequence pane can be opened from ![]() Edit Sequence in Edit Records.
Edit Sequence in Edit Records.
Note that by default settings, FRep2 stops functions when running app changes to call screen or Google Play app (see Apps). In addition, each record has Interruption settings to abort replay by any app or orientation change.
Sequence, the content of the record
The content of the record is shown as sequence item list.
The sequence is consists of items of operation record and control, and they are executed in numerical order during replay. Operation records will replay the operations recorded by console. Controls will judge the situation, repeat a part of sequence, or such. You can set the destinations of the control for judgement, for success and for fail respectively, to switch the next item to be executed.
For example, to download multiple documents of different sizes, which may take different time for each single process, you can prepare the repeat with recognition of ‘finish’ image to wait and progress properly. Or, to mark undetermined number targets in the list, which may require different position to tap, you can prepare the repeat with search some ‘unmarked’ image to detect the position.
* Please be sure to insert some wait time if the replay has repeat of operations which perform network communications, to avoid the load on the communication destination.
Item List
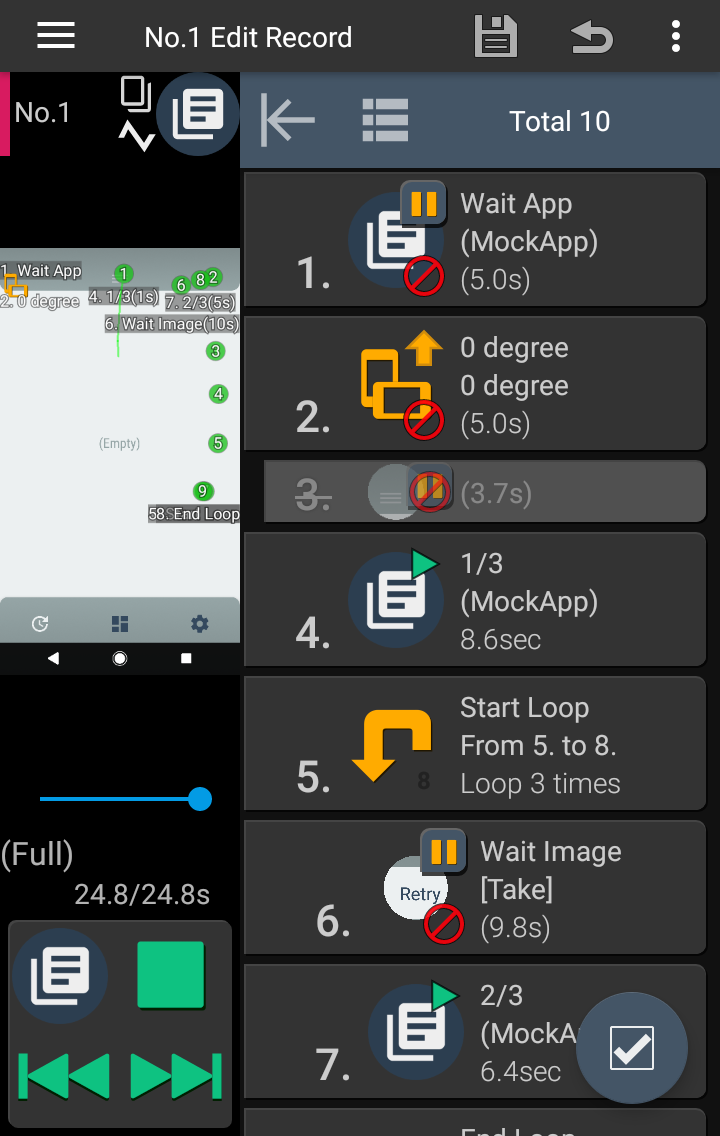
Each item is shown with its status and summary in item list. From the buttons in the top bar, the list size ![]()
![]() and the view type
and the view type ![]()
![]()
![]() can be switched*.
can be switched*.
Floating buttons

 Tap to start selection and open menu for selected items. Long press toggles whether item can be moved by long-press and dragging.
![]() (Only if list is long) Tap to jump to the
(Only if list is long) Tap to jump to the ![]() marked item. Long press to jump to the end/start, swipe up to jump to the previous bookmark.
marked item. Long press to jump to the end/start, swipe up to jump to the previous bookmark.
![]()
![]() Toggles the visibility of Skipped items.
Toggles the visibility of Skipped items.
![]()
![]() (Only if log exists) Toggles the display of last trace log. If the same item was processed multiple times in the log, it will be automatically split and the currently displayed split number will be displayed on the button (if there is no number, the last operation log for each item will be displayed). If Log screenshots also exist, preview pane reflects them.
(Only if log exists) Toggles the display of last trace log. If the same item was processed multiple times in the log, it will be automatically split and the currently displayed split number will be displayed on the button (if there is no number, the last operation log for each item will be displayed). If Log screenshots also exist, preview pane reflects them.
 Sequence No. / Status
At the left end of each item, status, tag color and sequence No. are shown. In list-type view, tapping the left end of the item will switch its state.
![]() Normal. Tag color will be shown as;
Normal. Tag color will be shown as; ![]()
![]() Marked, as preferred destination.
Marked, as preferred destination.
![]() Skipped; omitted without playing.
Skipped; omitted without playing.
![]() (Shown in preview)
(Shown in preview)
![]() (In editing)
(In editing)
For Scene check![]()
![]() ; starting item when all numbered scene check items do not match.
; starting item when all numbered scene check items do not match.
The control item(s) to check scene. The number indicates the order of checking process. If one control item matched (as the scene detected), the replay starts from the processing on success of the control.
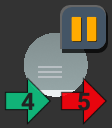 Icon / Destination
Each item has the icon for function, and overlapping small icons for settings. Refer next section for function icon. Common small icons for settings are;
![]() (At upper-right) In replay, the control console appears during the item’s process.
(At upper-right) In replay, the control console appears during the item’s process.
| Behaviour | On success at bottom-left | On fail at bottom-right |
|---|---|---|
| Proceed to Next | (Hidden) or | |
| Go to Designated | ||
| Abort (as failure) | ||
| Finish |
Under list-type view, the item’s summary is shown in the right side; label, type, settings, play/timeout seconds. In addition, in full-screen view after tapping ![]() button in the top bar, tapping the right end of the item will open settings pane directly*.
button in the top bar, tapping the right end of the item will open settings pane directly*.
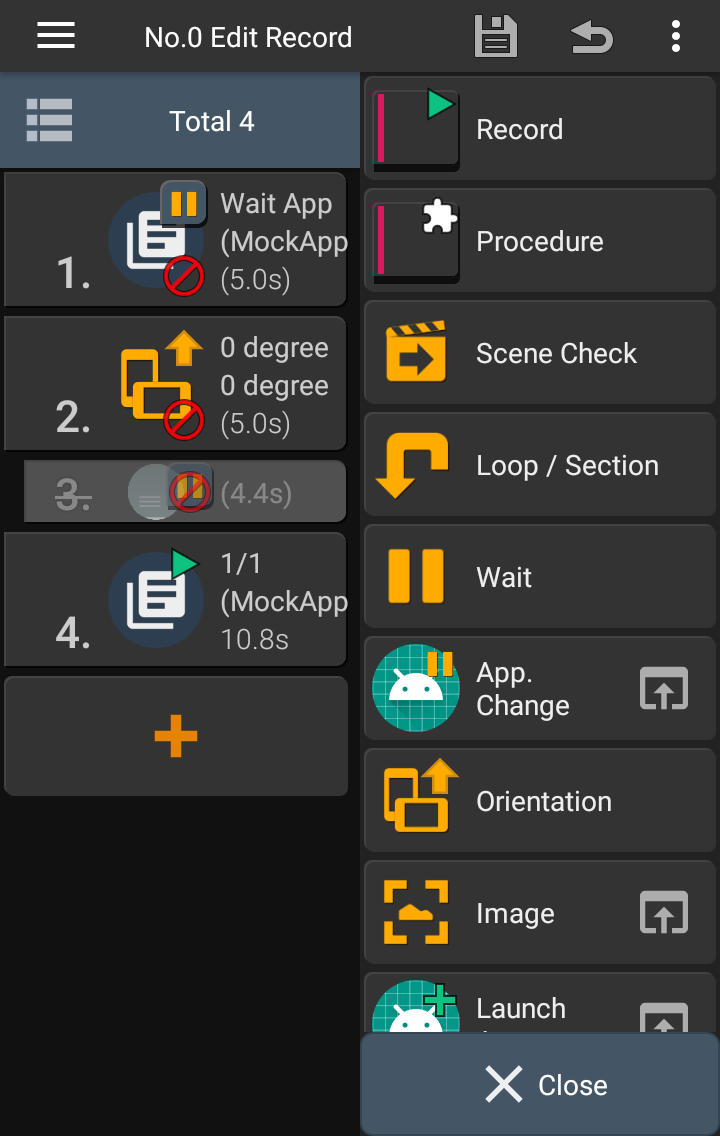
Add / Insert items
* Some details and settings are under construction.
 Record Add / Insert all items in the designated record.
 Procedure Call the designated Procedure. (Tips Video(CC)
![]() )
)
 Scene Check Do Scene Check of the editing sequence or the designated Procedure, and jump to the result.

 Loop / Section Repeat the selected items, or just section them. They can be collapsed / expanded.
 Wait Wait designated seconds.
 App Change Wait for the designated app.
 Orientation Wait for the designated device orientation.
 Image Check and wait for the appearance of the designated image in screen.
 OCR (Available only with
 ![]() Unlock Key) Check for the appearance of the designated word / string, or read string at designated location in screen.
Unlock Key) Check for the appearance of the designated word / string, or read string at designated location in screen.
 Launch App. Start the designated app.
 Kill App. Terminate the designated app.
 Push Key Play pushing the designated key.
 Touch Screen Play the designated touch screen at the designated coordinates.
![]() (Controls available only with Unlock Key)
(Controls available only with Unlock Key) Type Text (Only for
 ![]() Precision mode) Play the designated keyboard operations.
Precision mode) Play the designated keyboard operations. Set Clipboard Set the designated text to clipboard, as copied text.
 Screenshot Take screenshot.
 Play Sound Play short sound.
 Vibrate Vibrate device.
 Variables Set, calculate, handle FRep2’s variables.
 If Statements Branch the sequence flow by variable(s). Complex conditions can be set.
 Switch Statement Branch the sequence flow by variable(s). Multiple destinations for each condition can be set.
 Number OCR Recognize numbers and some symbols to store them in a variable.
Move Items to reorder
To replace the order of items to change the operation order, tap and hold an item and then drag it*.
If you want to move multiple items together, enclose them in a section (loop)![]() and collapse them so that they can be moved as one item
and collapse them so that they can be moved as one item ![]() .
.
*To prevent accidental movement, you can Disable Drag Move by long-pressing the bottom right button or from Edit Settings in the menu. When drag move is disabled, the bottom right button will display as  .
.
Menus for Individuals, Selection
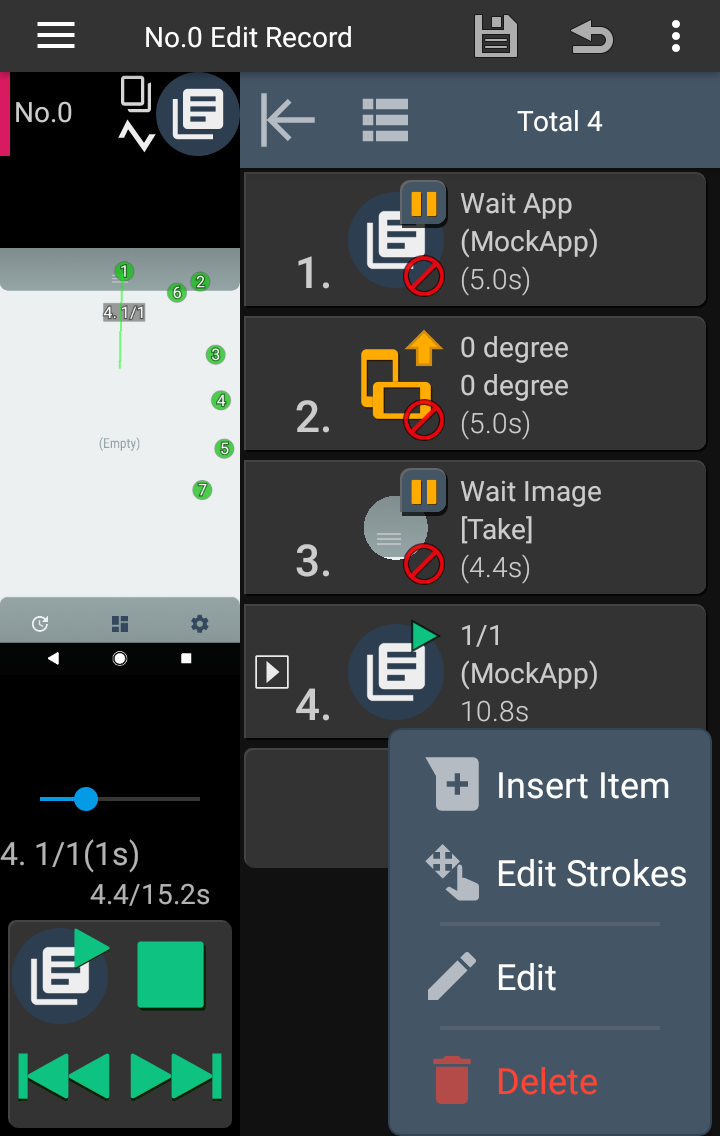
Tapping each item will open the menus for it. Tapping ![]() (or
(or ![]() ) at bottom-right button and items will select them, then tapping the same button
) at bottom-right button and items will select them, then tapping the same button ![]() will open the menus for the selected ones.
will open the menus for the selected ones.
![]() (Only for item with destination) Scroll to the destination item.
(Only for item with destination) Scroll to the destination item.
![]() Insert Item Add new item before the item (first one if multiple items selected).
Insert Item Add new item before the item (first one if multiple items selected).
![]() Select Contents Select inner contents of the Loop / Section.
Select Contents Select inner contents of the Loop / Section.
![]() Edit Strokes Open Edit Strokes to edit touch coordinates and intervals in the item.
Edit Strokes Open Edit Strokes to edit touch coordinates and intervals in the item.
![]() Edit Open settings pane for the item.
Edit Open settings pane for the item.
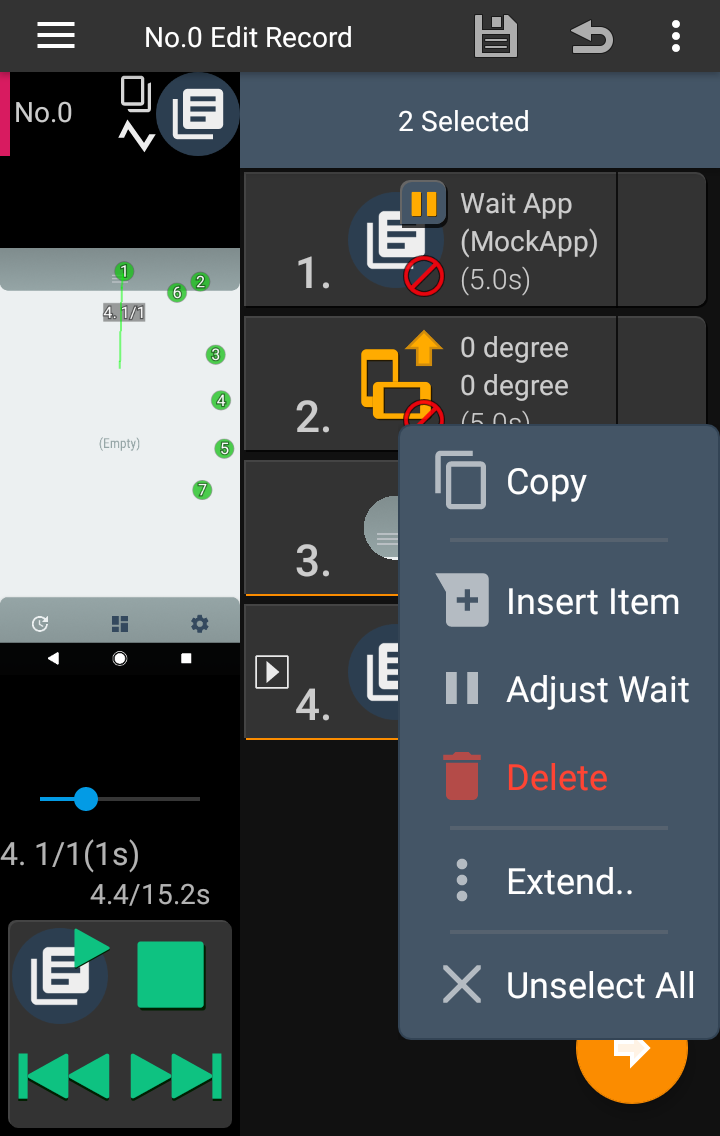
![]() (Copy/Paste are available with Unlock Key)
(Copy/Paste are available with Unlock Key)![]()
![]() Copy / Paste Copy selected item(s) / Paste item(s) before the item.
Copy / Paste Copy selected item(s) / Paste item(s) before the item.
* To paste at end of the sequence, press + button at the end of list.
![]() Duplicate Duplicate selected item(s) and add to the end.
Duplicate Duplicate selected item(s) and add to the end.
![]()
![]() Collapse / Expand Collapse / Expand items in Loop / Section.
Collapse / Expand Collapse / Expand items in Loop / Section.
![]() Split Strokes Open Split stroke screen for selected operation items.
Split Strokes Open Split stroke screen for selected operation items.
![]() Adjust Wait Open Adjust wait screen for selected items with wait settings.
Adjust Wait Open Adjust wait screen for selected items with wait settings.
![]() Adjust Timeout Open Adjust timeout screen for selected App change, Orientation, Image items.
Adjust Timeout Open Adjust timeout screen for selected App change, Orientation, Image items.
![]() Set Next Wait Open Set next wait screen for selected Image items.
Set Next Wait Open Set next wait screen for selected Image items.
![]() Adjust Coords Open Adjust coordinates screen for selected operation items.
Adjust Coords Open Adjust coordinates screen for selected operation items.
![]() Extend.. Open extend menus for selected items.
Extend.. Open extend menus for selected items.
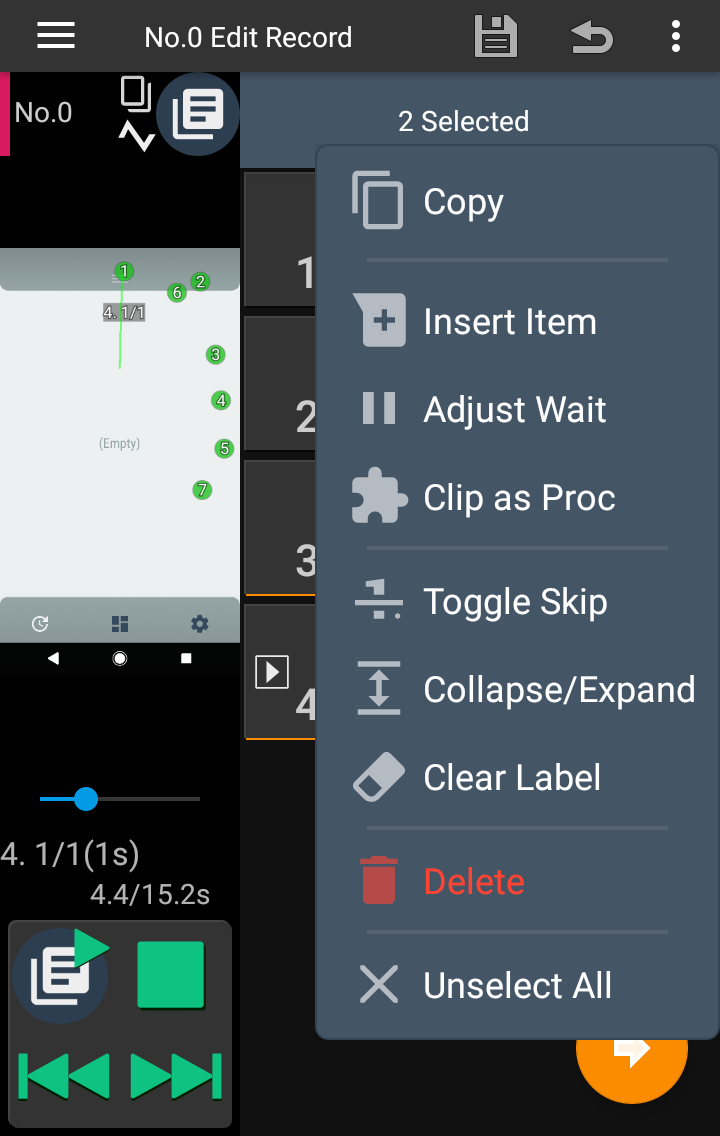
Extend menus have additional menus as follows.
![]() Show Console
Show Console ![]() Hide Console Set/Unset the Show Console settings for selected items.
Hide Console Set/Unset the Show Console settings for selected items.
![]() Unset Scene Remove scene check settings from selected items.
Unset Scene Remove scene check settings from selected items.
![]() Clip as Proc Clip selected items as new Procedure.
Clip as Proc Clip selected items as new Procedure.
![]() Toggle Skip Switch the skip/active state of selected items.
Toggle Skip Switch the skip/active state of selected items.
![]() Clear Label Clear the label of selected items, to hide popup messages for them.
Clear Label Clear the label of selected items, to hide popup messages for them.
![]() Delete Delete the item(s).
Delete Delete the item(s).
Menus
![]() Save Apply and save current settings.
Save Apply and save current settings.
![]() Load Load last saved settings.
Load Load last saved settings.
Select.. Select items in list; Select All, select by type, select by state.
Unselect All Clear selection.
![]() (Only with Unlock Key) View Last Log Show the detail log of last replay, including the finish reason, variable values, etc.
(Only with Unlock Key) View Last Log Show the detail log of last replay, including the finish reason, variable values, etc.
Log Screenshots (Only with Enable Log Screenshots: ON / common setting as other screens) If ON, trace log will also store the screenshots taken on next replay.
Update Cover Image Set the cover image which is shown in Records screen, the first screenshot in the list. *The screenshot must be taken during recording by FRep2.
Item Appearance
- Common Display Type If ON, the same view type


 is used for other records.
 - Color by Marks Items without specified tag color will be displayed with an automatically assigned tag color, with bookmarks as separators.
- Show Simple Branch Color branch of single item, i.e. 4 items of 1,2,3,4; control 1 with On Success: Next (to 2) and On Fail(Timeout): to 3, item 2 with On Finish(Success): to 4, item 3 with On Finish(Success): Next (to 4).
- Show Last Replayed (Only with Unlock Key) With replay log, show last replayed item, marked with
 successfully finished or
  interrupted.
 - Slim Loop/Section (Only for list type) Show Loop and Section items with half height.
- Short Skipped Item (Only for list type) Show Skipped items with half height.
- Loop/Section View (Only for icon type) Show Loop and Section items with full width.
- Show Preview Icon For operation item, show screenshot as icon instead of app icon.
- For support (Force hidden items to appear.)
Editor Settings
- Skip Confirmation Skip confirmation when deleting items.
- Disable Drag Move If ON, the position of items are fixed. Shown as
 and long-tapping the circle button switches the state.
 - Always Extend Menu Show all menus for selection, instead of partial ones with ‘Extend..’.
- Edit on Tap Item Open edit pane directly instead of open menus for individuals.
- Edit Coords First Open Set Touch Point screen on edit Touch Screen control.
- Compact Editor Remove section names from the edit screen.
- Always Variable UI Always show settings for variables, even if there are no variable items in the sequence.
- Show Failed Test Rect Show reference rectangle, even when the test failed for Image control.
- Move to Last Replayed (Only with Unlock Key) With replay log, scroll to the last replayed item when the Edit page open.
Data Settings
- Minify Oversized Image If large target is set in Image control, save the scaled down image data, to store in database.
- Disable Media Filter On Android 10~, if no screenshot file shown in Image media from Image file selection, try switching it ON. (Reported Xperia XZ3, Android 10)
Pane Settings
- Auto Ratio Switch 1:1 or 1:2 of left:right pane ratio according to the screen width.
- 1:1 Always use 1:1 pane ratio.
- 1:2 Always use 1:2 pane ratio.
- Rebuild Dialog Support setting for devices on which some setting dialog does not appear but dark screen.
